

Moving on to the Kitchen…
The thought of moving onto the kitchen is a little scary as there is so much to think about. The process will start by researching floor, ceiling, walls, electrical, cupboards, design and placement. So much to think about becomes both exciting and stimulating.
Here are pictures I took along the way:


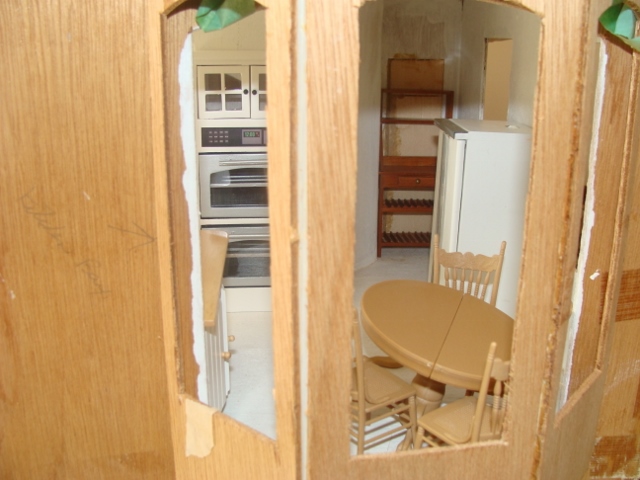

The set up seems ok…so now onto the floor, ceiling and wallpaper choices.
I cleaned out all of the space to take a pattern of the ceiling and floor. I had always planned on tin ceiling and thought of copper for the kitchen. So onto deciding what exactly does copper mean for the ceiling. Tried various colours and decided on the darker shade. Then onto the floor. Although I had always thought of doing tiles, once looking for the effect I really wanted I decided that the vinyl/lino flooring would be best. I don’t particularly like tile. I always feel that the grout lines used are to wide when done in miniature. So linoleum will be the choice for me. A whole day of research, pattern, colour, texture, test printing, adjusting patterns both sizes and design. Many hours of frustration and finally I found one only “tile” which I then made into a sheet of repeated patterns. When I printed the final result…the light went on and there it was. Loved it immediately. Time doing research and thinking was well used.
Now onto the walls….paint, wood panel or wall paper. The paint looked a little dark but a good way to start. Eventually an old piece of wallpaper seemed to do the trick. At least for now. The three seems to work well together.


Before applying wallpaper I made sure to place lots of wiring and made notes along with extensive photos to show where the wire is. I prefer to put lots of wire at this stage since the lights aren’t yet decided upon.
Currently I’m not as intimidated as I used to be when I first did the wiring. This comes from a lot of trial and error along with a lot of frustration from not having done the proper wiring or from not keeping the proper records and having to remove wallpaper to redo the wiring. Better spend the extra time to record and take the proper precautions. Here I placed electric tape over the brads where the wires cross as they tend to come loose.


So now to make sure that I have run all the wiring I need I must check the exterior to see that I have wire running up to the other levels as well as to the side. Then I must figure out what windows I am going to use and if any changes need to be made to where they are so that I can build up the thickness of the walls where the windows will be installed.


Then check the bay window in the kitchen and decisions on what to do with the rest of the wall in the kitchen.


Wallpaper is the next step followed by another trial on the set up of all the items I want in the kitchen. Over the years I have collected many hutches and shelving units. The problem now is which to use and which to sacrifice to editing. See what I mean:


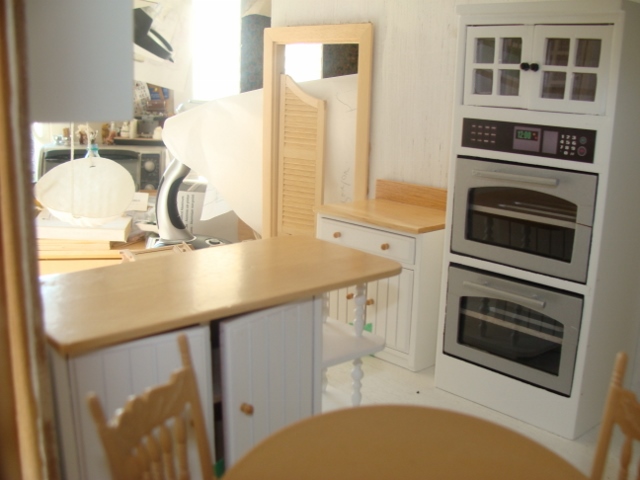
Some serious editing with the help of my friend Elizabeth and hours of turning things around, resetting and going to sleep on it. The next morning it clicked. The wall oven and refrigerator plus one lower unit on the left wall. Loved it. then I would build joining shelf unit to be left open to display the many kitchen things I have, which might need a very serious edit as well. As you see below before the final trimming is done. Very pleasing to my eye.


Across the wall with the oven and refrigerator will be the island. One of the biggest problems I had with the kitchen was finding a spot for the sink and there was no stove top. The picture above shows my intention of using the island to set the stove top and when that was tried out, all of a sudden the rest of the kitchen just made sense. When I placed the bottoms I had together the kitchen counter seemed odd as there were slightly different heights on the units. Plus I wanted to ad another bottom just or trays. I made a little unit to go between the island (in the corner) and the sink unit. The sink unit had it’s own counter which I removed. Then I removed the island counter top and made one continuous oak counter. Yikes…just when I thought I had everything I needed for the kitchen. At this point my friend Elizabeth of “Studio E” would say that the lady of the house was quite fussy and would not settle for just whatever. Thank you for being my background reasoning voice. At some point in time I must have thought of making my own sink unit because there with all my odd and ends I found a sink as well as a faucet. The faucet, however, was for a vanity set. Not quite right for the kitchen sink.


The idea of removing the existing counter tops was very painful but needed to be done. Here you can also see the little bottom unit I made to enlarge the counter top space as well as move the sink further away from the stove top. Once again…after visiting Ross’ Treasure house to ask about a stove which I could remove the burners from or perhaps buy just the burners….I found them in my stash. A good thing that he did not have a stove which I liked nor the actual burners. Hmmmm….maybe I had planned on doing just that but forgot. A late night search into my drawers and there they were. Painted the knobs, grills and later have added a piece in the centre. The burners looked too far apart.


The kitchen faucet came about by picking a variety of jewelry findings, copper wire – as it is easily bent into shape, glue and paint to hold it all together. Let’s not forget that we also needed a soap dispenser. Maybe not something you would find in a Victorian kitchen of years past, but remember this house is lived in by a modern family who have transformed the house to include modern day comforts. That’s my story! 🙂


The next thing to consider would be the kitchen knobs. Not particularly loving the wooden knobs. That would mean locating some jewelry finding or making one and produce a mold. Luckily I found a little earring rosette. I made a mold of the earring and reproduced it in polymer clay. I found that the little rosettes complimented the kitchen faucet. Love it when that happens.


I also made the little shelf unit for the end nook. Open shelves will eventually house a bunch of canning and jars and boxes etc….


